Adjusting the low load;
Best is to do this when you start from a cold machine.
Take the tryer out and put that between the bean release door so that the machine takes longer to heat up.
Now start the machine as usual, and heat up the machine.
1.- First, on the control unit press F2 2 times until a login screen appears
2.- Type in 7071 by using the on-screen keyboard
3.- Press F2 once more to enter the adjustment page
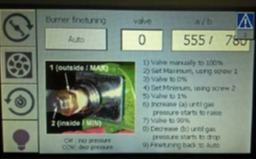
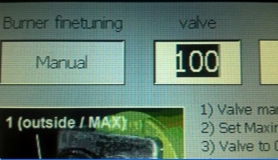
In the field "valve" type in 100 (as in 100%) then tap the button that says "auto" which will change it to manual mode.
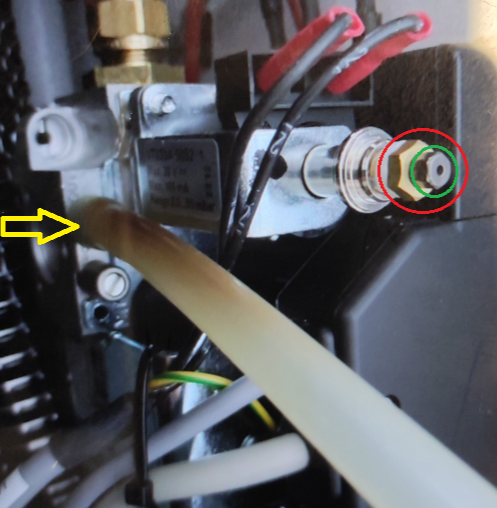
5.- Go to the back of the roaster and locate the top screw of the gas valve (marked with the yellow arrow) turn it three times to open it, and then make sure the pressure gauge is turned on and set to “0”, now you can connect the hose at the inlet.
6.- Check what is the low load, if the load is less than 0,8mbar you should adjust it until the pressure gauge reads 1mbar.
To adjust it proceed to remove the plastic cap to access the nuts. You will need an 8 mm wrench and a 5.5 mm wrench. With the 8 mm wrench, hold the copper nut marked with the red circle while using the 5.5 mm wrench to gently adjust the nut marked with green in order to raise the mbar to 0,8mbar.
To raise the low load to 0,8mbar, turn the nut clockwise.
Once you have finished making the adjustment, disconnect the pressure gauge and quickly tighten the screw. Do not overtighten as this may break it.