
Create a reusable roast profile from scratch, or change the settings in an existing profile. You do not need a previous roast to create one.
A profile is a reusable plan with settings and optional triggers. A roast records one actual batch. Creating a profile from scratch does not create measured temperature readings.
Before you start: have your roaster model, planned batch weight, and established starting settings ready. Make changes between roasts. You can prepare the profile before connecting to the roaster; review all control values before loading it for use.
1 Choose your starting point
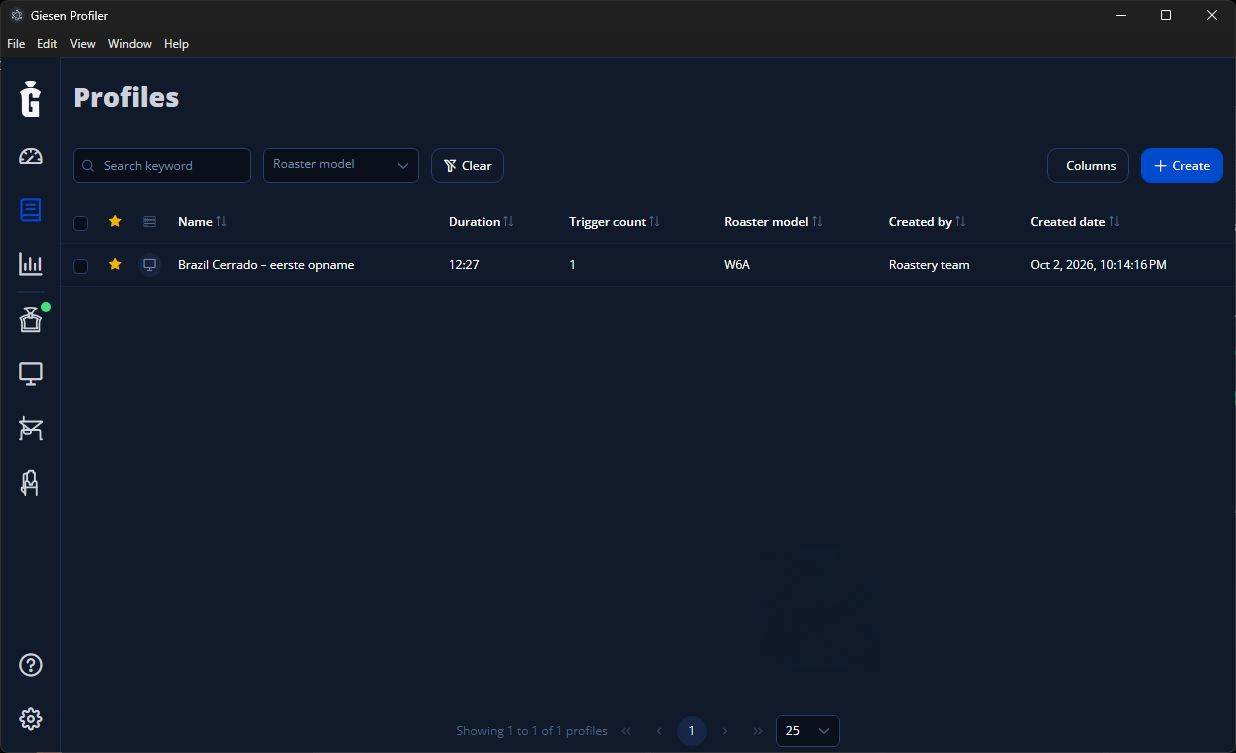
Use Create for a new profile, or search for an existing one. The example profile name will differ from yours.
Open Profiles. Choose one of these routes:
- Create a new profile: select Create. Enter the details below, then select Create in the dialog to open the editor.
- Edit an existing profile: search for it, open it and select Edit profile.
Use a name you can recognise later, such as Brazil Cerrado — 5 kg — trial 1. You can replace the automatic name when creating a profile.
2 Check the profile details
For a new profile, fill in the creation dialog. For an existing profile, open Editor → Details. Check the roaster model, batch weight, and displayed units before changing control values.
| Field | What to enter |
|---|---|
| Profile Name / Name | A clear name for the recipe and batch. |
| Bean Type | The coffee this profile is intended for. |
| Start Weight | The planned weight of green coffee. Check the displayed kg or lb unit. |
| Expected weight loss | Your estimate, if known. Entering a percentage calculates an estimated End Weight from the Start Weight. |
| End Weight | The planned roasted weight. This is an estimate in a profile; record the actual measured weight in each roast. |
| Roaster model | The model the profile is designed for. Check it even when Profiler has filled it in. |
Enter or check Start Weight before Expected weight loss, then check End Weight. If you change the start weight later, check the estimate again. For example, a planned 5 kg batch with 15% loss gives an estimated end weight of 4.25 kg. This calculation is an example, not a target for your coffee.
In the creation dialog, check Use RPM against your roaster's drum-speed unit. In the editor, eligible models show Drum Speed Unit under Details, with Convert to RPM or Convert to Hz. Use the conversion controls when needed; do not enter an RPM number into a Hz field.
3 Set the starting values and timed changes
A new profile starts with default setpoints and an End Time of 15:00. These defaults are not a recommended recipe. Review every control before using the profile on a roaster.
Open Editor → Setpoints and select the control you want to change. The editor includes Air, Power, Pressure and Speed. Check the unit beside each control. The settings you can use depend on your machine.
- Select a row in that control's timeline to edit it.
- Check Time and Value. A time of 00:00 means the beginning of the profile; later times are elapsed roast time, not the clock time.
- Select Save in the row's edit form.
- To add a later change, select Add, enter its time and value, then select Add in the form.
- Repeat for the other controls. Use the trash icon beside an unwanted point to delete it, then check the remaining timeline.
For Power, select AUTO, OFF or ON as appropriate; ON allows a percentage value. Choose the mode your machine and recipe require. Use known settings for your roaster rather than copying the numbers from a screenshot.
Check the point at 00:00 for each control. It can be sent when the profile is loaded if Initialize setpoints on profile load is enabled. Saving the profile and loading it for playback are separate steps.
If an Overwrite setpoint prompt appears when adding a point at an occupied time, check both values before choosing Overwrite. Use Cancel if you want to keep the existing point.
4 Check events and optional triggers
Open Editor → Events → End Time, select the existing end entry, enter your planned duration and select Save in the form. Keep planned setpoint changes inside that duration. A setpoint exactly at End Time is not run as a normal timed change during playback.
Crack and Notes are timeline markers. A planned Crack marker does not detect first crack in a future roast. Monitor each batch and mark its actual first crack.
If you need a timed reminder or another action, open Triggers. Follow How to use triggers for the full setup. Review existing triggers when editing an older profile, even if you only changed one setpoint.
If the profile contains a Between Batch plan, review its status, setpoints, and triggers too. An enabled BBP can run after the roast ends, including after Play as Reference. Follow Use Between Batch Profile to prepare or disable it.
5 Save the complete profile
The Save button inside a point's form applies that point to your working profile. Use Save at the top right to save the complete profile.
- Save: creates the new profile or updates the existing one.
- Save and close: saves the profile and leaves the editor.
- Save as: saves a separate profile under a new name. Use this only when you want to keep the original version.
When making a variation, choose Save as before saving over the original. You do not need a duplicate for every roast.
Return to Profiles, find the profile and reopen it. Check its name, model, weights, timeline and triggers. If a save error appears, keep the app open and resolve it before leaving. Check the sync status before relying on the profile on another computer.
6 Use the profile for your next roast
Follow Use a saved roast profile to prepare, load it, and choose Play as Reference or Play. Make edits between roasts. If the profile was already loaded, save your edits and load the saved profile again before the next roast.
A profile created from scratch has setpoints but no recorded bean-temperature curve. Play as Reference does not run those setpoints or triggers. If you want a measured reference curve first, follow Record your first roast.
If something does not look right
| What you see | What to check |
|---|---|
| No bean-temperature reference curve | A new profile has no recorded readings. Record a roast if you need a measured curve. |
| A point changed, but the profile did not keep it | Apply the point's change, then use Save at the top right. Reopen the profile to check. |
| The original profile changed | Save updates the current profile. Use Save as before saving if you want a separate variation. |
| A field shows an unexpected unit or value | Check the roaster model and displayed units. Review the timeline after editing. |
| A setpoint at End Time did not run | Put a planned playback change before End Time. Control discharge and cooling using your normal machine procedure. |