
Use a saved profile for your next roast in Giesen Profiler 2. You can follow its curve while controlling the roaster yourself, or let Profiler run its saved setpoints and triggers. Both modes record a new roast.
You need: a connected roaster showing current readings and a saved profile suitable for your machine and batch. If you do not have a profile, create one from scratch, or record your first roast to create one with a measured temperature curve.
1 Prepare before loading
For your first roast with a saved profile, use a manual start so you can choose the playback mode yourself. Open Settings → General and check these settings before loading:
- Initialize setpoints on profile load: off.
- Reset setpoints on profile finish: off.
- Enable Start Delay: off.
- Under Automation, set Charge Detection Auto-Start to off.
Select Apply Changes if you changed any settings.
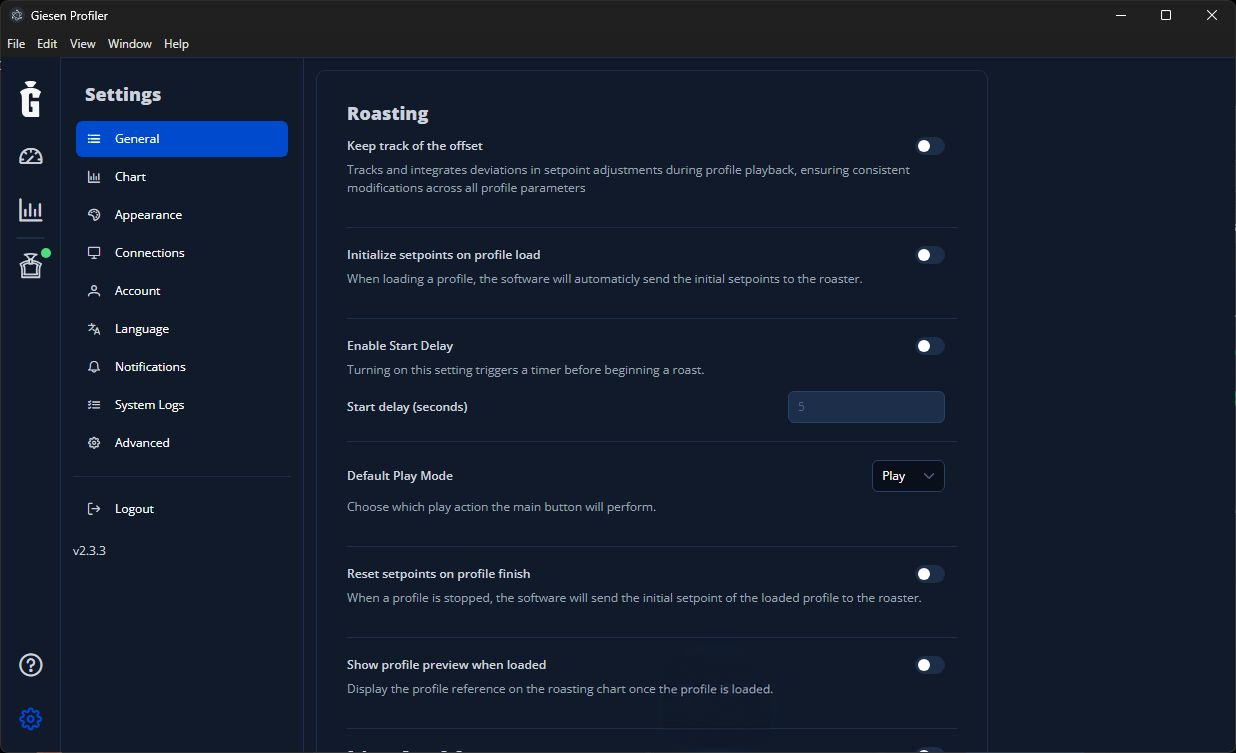
Keep Initialize setpoints on profile load and Reset setpoints on profile finish off for this first use.
Loading can send the profile’s initial setpoints to the roaster when Initialize setpoints on profile load is on. Play as Reference does not override that setting. The settings above also prevent initial setpoints from being sent again when you stop, and prevent charge detection from starting playback automatically.
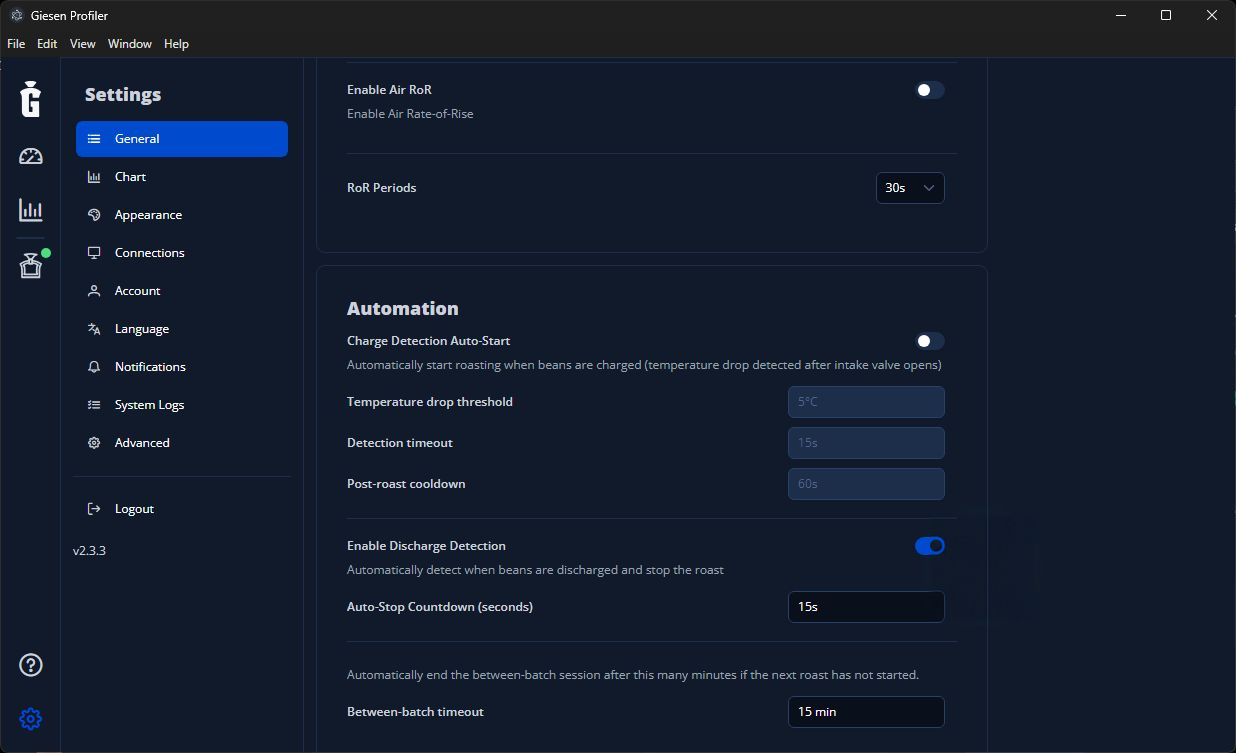
Turn Charge Detection Auto-Start off so you can choose the mode and start manually.
Set the roaster’s starting conditions yourself and confirm that it is ready for this batch. For more about these settings, see Settings for your first recording.
Check Between Batch Profile (BBP) before loading. An enabled BBP can apply settings as soon as the roast recording ends, even after Play as Reference. For a roast you plan to control manually through the interval as well, open Edit profile → Editor → Between Batch, select Disable BBP, and save the profile before loading. See Use Between Batch Profile.
2 Select and load your profile
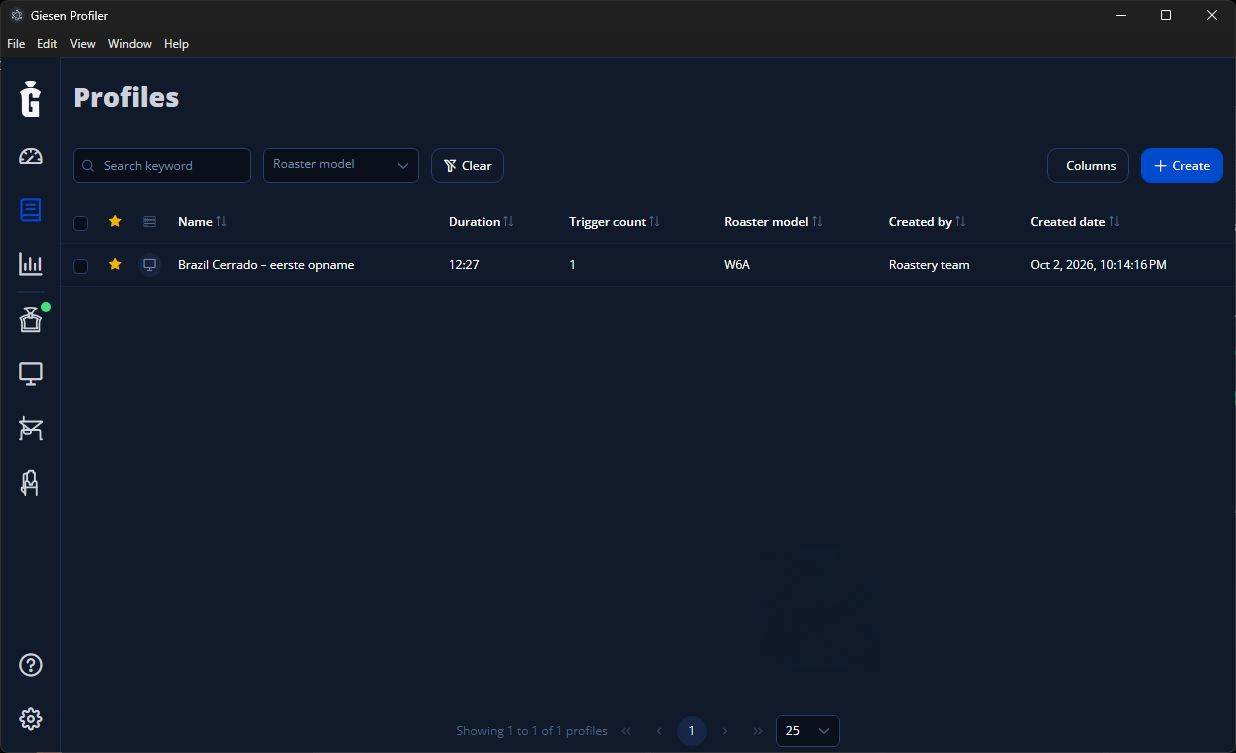
Search for your own saved profile. The example name may differ from yours.
- Open Profiles and search for the profile you want to use.
- Open the profile and review its chart, roaster model, batch weight, starting setpoints, Triggers, and Between Batch configuration. Check that its temperature and control units match your roaster.
- Select Load profile.
- If an inventory window opens, select the beans and actual quantity for this batch. Use Skip only if offered and you are continuing without linking inventory.
You return to the dashboard with the profile loaded. To see its curve before starting, enable Show profile preview when loaded in Settings → General and select Apply Changes. A profile created from scratch can contain setpoints and triggers without a recorded temperature curve.
3 Choose how to use the profile
Open Play options using the arrow beside the dashboard play button. Clicking a named mode starts that mode; wait until you are ready to charge. The yellow star marks the mode used by the main play button.
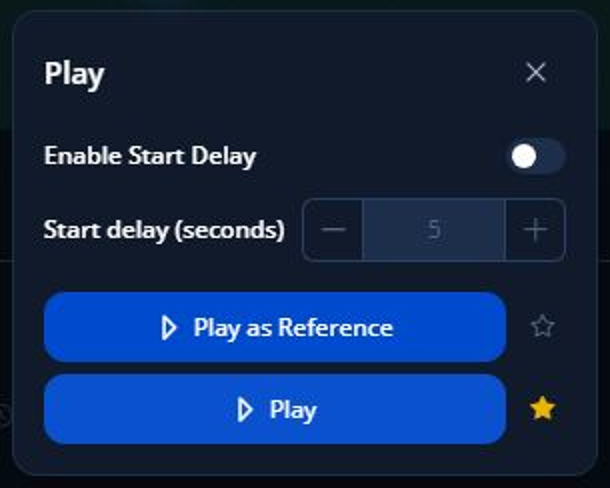
Use the named Play as Reference or Play button. Start Delay is off in this example.
| Mode | What Profiler does | What you do |
|---|---|---|
| Play as Reference | Shows any saved temperature curve and records your new roast. It does not run the roast profile's setpoints or triggers. | Adjust the roaster yourself while comparing live readings with the reference, if present. |
| Play | Records your new roast and runs the roast profile's setpoints and triggers. | Check the actions before starting and monitor the roast throughout. |
Start with Play as Reference if you want to learn the profile before using automatic playback. A saved curve is a guide; the same settings can produce a different result with different beans, batch sizes or starting conditions.
4 Start and monitor the roast
- Prepare the roaster and charge the beans using your normal procedure.
- At the charge moment, open Play options and select Play as Reference or Play.
- Confirm that the roast timer runs, live temperature readings appear, and the stop button is available.
With Play as Reference, make your own heat, airflow and drum adjustments. With Play, monitor both the curve and the machine’s response to the saved actions. For action setup and execution details, see How to use triggers.
If a trigger has Persist after roast stop enabled, its delayed actions can continue after Stop. Check the machine controls and any remaining timer indicators. Cancel removes a pending action; cancelling a switch-off does not switch the control off. Delayed actions may be absent from the timer list. See How to use triggers before cancelling.
Mark Crack when first crack occurs in this batch. A first-crack marker from the reference profile is a comparison point, not detection of first crack in the current roast.
5 Stop and check the saved roast
- Discharge and cool the beans using your normal machine procedure. Stop the recording at the actual end of the roast. If Discharge Detected appears, choose Stop Now at the actual end, or Continue Roasting if the detection was incorrect. The Profiler stop button ends recording and roast playback; use the machine's controls for any required machine stop.
When you used a loaded profile, Profiler saves the new roast and opens Roast details. This is different from the Save Profile step after a first recording without a loaded profile.
- In Roast details, check the name and actual Start Weight for this batch. After cooling and weighing the roasted beans, enter the measured End Weight. Values may come from the profile, or the start weight from your inventory selection. After changing a value, select Save when it appears and wait for saving to finish.
- Open Roasts and confirm that the latest entry contains your recorded curve and correct weights. You can reuse the same profile for each batch. Local saving and cloud synchronisation are separate: check the sync status before using the result on another computer.
If something does not look right
| What you see | What to check |
|---|---|
| The dashboard shows Record | Load a saved profile before choosing a playback mode. |
| Load profile is unavailable | Finish the active roast and resolve any unfinished save first. |
| The play button is unavailable | Read its tooltip and check the connection, machine state and your account access. |
| No reference curve appears before starting | Enable Show profile preview when loaded. Check that the profile contains recorded readings. |
| Profile triggers do not run | This is expected in Play as Reference. Use Play after reviewing the actions. |
| The saved weights are wrong | Open the roast details, enter the actual weights and save the change. |
Before starting another roast, confirm that the previous recording was saved. If a save error appears, keep the app open and resolve it first.